West Mountain Farm

Pastured Pigs, Free-Range Chickens, Biodynamic Gardening, Homesteading

Supplemental Lighting For Laying Hens

So, its been a great spring and summer with a daily basket full of eggs, as a homesteader you couldn’t be more thrilled. Then, the temperature drops, the leaves turn colors, and the hours of daylight begin to shrink-along with your bounty of eggs. You walk into the coop one morning and it looks as if a pillow fight has occurred, the coop is more quite, and your once fluffy chickens look a little worse for wear. The autumn molt has began and the process should be allowed to continue, they usually lose their feathers in patches, the most noticeable being the neck and tail feathers (a good time to collect for crafts).  The process takes one to three months depending on what kind of nutrition they are given, breed, and age of the chicken. They need extra protein at this time to regrow new feathers and get back to laying eggs and staying warm. The first molt usually occurs their second fall after their first laying ‘season.’ So if you had spring/late winter chicks they should  begin laying that first fall and then go through a molt the NEXT fall.  If they have adequate nutrition your first season chickens should lay all winter, spring, and summer with a gradual increase and subsequent decrease, without the help of lights. Now that your hens are molting its time to accept the empty basket of eggs and simply feed them well and give them peace and quiet until they all but through with the process. Handling should also be limited because the tender new feathers coming in damage easily and are probably uncomfortable to be messed with.

Around mid-October or early November the molt should be coming to a close and your hens got a rest from laying. You may notice that their combs and wattles are light pink instead of bright red and they seem to have smaller hips, instead of the volumptous hen petticoat booty. This is a sign that their hormones still haven’t kicked back into gear after the molt, this is were the supplemental lighting comes in handy.  The short day length will keep it that way until spring as a way to adapt to the lack of food in winter. Since they have you to graciously feed them year-round this winter survival adaptation is no longer necessary. The coop lighting will stimulate the pineal gland and kick start the endocrine system back into laying mode. There are many ways to do this and it may take some research on your part to find what works best for you and your flock. I will describe our method as it has worked well for us and is backed by experience and scientific research.

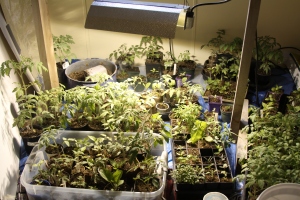
When we see that the molt is coming to a close and the hens have had at least a one month rest, which happens to be this time of year, we place a soft white bulb (you could even use christmas lights) in the coop and put it on a timer to come on in the MORNING and turn back off anytime after sunrise to save electricity. I heard you shouldn’t use fluorescent lights because chickens can see the slight flicker and it drives them nuts. All kinds of inexpensive timers can be bought at your home improvement stores. This will ensure constancy in the light sequence because you are going to forget one morning. The reason not to artificially increase day length in the evening is because we want them to go to roost at night and not be confused by the light and get lost.  We set it to come on 30 minutes before sunrise for a week, and increase it by 30 minutes every week until they have reached 15-16 hours of light. A quick google of sunrise times for your location will give you  a specific time and continue to adjust to keep up with the changing sunrise/sunset cycle. In 2-6 weeks they should start laying again (so they still get a little more of a rest).  When it gets really cold I switch the light to a heat bulb, but please make sure that it is secure.  You still run the risk of an accident with a heat lamp, but its one I am willing to take  to prevent frostbite, conserve calories, and have a defrosted water pan. We still run electric cords to the coop but plan to wire it soon, we even have the supplies to bury the line, we just have an endless to-do list. We also need electricity because we plan to wrap our Chicken Fountain in heat tape so we can use it year round. The places where I plugged extension cord to extension cord and where the light is plugged in is protected by a feed bag that I cut the other end off. I basically put a ‘pillow case’ at each plug in so the chickens can’t scratch or peck at it. Yes, I know its hillbilly, but we make the best of what we have 🙂

Some people leave a light on all the time, I do not agree with this nor do poultry experts. They really need 8-9 un-interrupted dark period, just like we do. I think if you allow the hen to come into and out of the molt without interference coupled with sound nutrition and fresh water she will have adequate rest and won’t be ‘used up’ before her time or have her lifespan shortened. Each hen is born with more ova than she can turn into eggs in her lifetime, so no worries there either. I know some people feel like chickens deserve a break all winter, but I don’t think it harms them, and this is a homestead, not a zoo. It just wouldn’t be sustainable to feed them all winter every winter with very few eggs. And this was an adaptation in response to lack of food, which isn’t a problem anymore, they are quite spoiled compared to their ancestral jungle fowl. No body freeloads around here as we all work together and support each other, and if I don’t have some eggs to fuel my body to work the farm then everyone is in trouble and hungry.

In summary, lights are usually needed only their second winter after they have completed their first laying season. Your situation may vary depending on when they were hatched and other environmental factors.  Allow them to have a natural, uninterrupted molt and rest. After the molt, introduce light gradually in the morning with a timer for convenience and then put it away in spring when the daylight has lengthened again. Be safe with bulbs and electricity, chickens do fly and get rowdy. Consider professional wiring for safety and ease of use.  Devise and provide a good nutrition plan with access to fresh drinking water and good husbandry.  As the hens mature you will probably get less eggs over time, but they will increase in size and have less egg abnormalities

IMG_3108

Cooking Fresh Green Beans

Most people are used to bland canned or frozen green beans from the grocery store that are basically season, heat, and eat.  Fresh green beans take a little more effort, but are more than worth the extra time. The best way is to have a friend with you as it does get monotonous.

First step is to pick the green beans. Pick your plants heavy and often and they will keep producing, all season. Before you know it you’ll be wondering when the freeze is going to kill them out!

Next, sort the beans, pick the tender, young pods free of rust for yourself and give the big fibrous ones that you missed last picking to the hogs, worm bed, chickens, or wildlife.

Third, string them if they are a string variety. Did you know the first stringless green bean was named ‘lazy housewife’ ? You want to pick the strings from all four ‘corners’ of the bean removing as much as you can. I hear a green bean frencher makes this job a breeze, but then they are all french-style. I’m sure I’ll try one day, but so many gadgets, so little time. Then you snap them into bite size pieces or leave whole for other dishes. Give the ends of the beans to the critters also.

Fourth, Cook them in a bit of fat, liquid, seasoning. My favorite fats are extra-virgin olive oil, butter, and pork drippings (and add the meat back toward the end if available). I like my liquid to be broth and a splash of dry wine in the end. You can season with sauteed garlic and onions (if so do this in the beginning before you add your beans and liquid) or the convenient route- garlic and onion powder. Salt and pepper of course, and some herbs out of the garden the last 5 minutes of cooking time. Different beans have varying cooking times and preference for eating. Tender yellow bush beans only need a quick steam, a drizzle of lemon juice, salt and pepper, and olive oil to make for a delicious side. Pole beans often need 20 -40 minutes to cook down and become tender. This property makes them more suitable for canning.  Adding tomatoes, squash, and mushrooms during the cooking will make a meal out of your green beans.  Play with the recipe, taste test often.   You will have you feel for bean snapping and cooking in no time.  And the plant will give you plenty of beans to experiment!

Last, Eat them!!!

Here’s a heartier, soupy version I made after working in the garden all day. The liquid is chicken broth, tomatoes, and maitake mushrooms cooked down with some fresh herbs (lemon thyme, parsley, and basil) powdered garlic and onion. Add parmiggiano reggiano for a rich treat. Olive oil and butter bring out the flavors and make the nutrients more bioavailable.  These pole beans, a mixture of kentucky wonder and bush blue lake, took about 20 minutes at low-medium to cook down to my desired tenderness.

photo-11

Savor your bounty, you earned it. 

Putting Your Garden to Bed and Preparing the Homestead for Winter

Now is the time to start the process of putting your garden to bed. Things are in their last push and other warm weather loving plants are dying, consecutive cold days and nights are coming, so pick everything you can ASAP, dry herbs, make green tomato relish, freeze bell peppers, dehydrate, freeze, etc. Remove disease and bug harbors like dead tomato vines, other nightshades, and curcubits (squash and cucumbers). Okra, corns stalks, and dead herb branches can be incorporated into the soil or composted. Adding mulch and organic matter is the most important, which can protect perennials, bulbs, and the soil structure itself. Now is also a great time to add soil amendments that will be bioavailable for your garden next spring. Lime all the beds that are going to rest for winter. Taking care of your investment of garden tools is important if you want to get all the life out of them that they are worth. Collect them from the yard, give them a quick clean, let them dry in the sun, oil movable parts, and sharpen blades. If nothing else, get them out of the weather in a barn or shed to protect them from the elements. If you are feeling really spunky you can organize them in buckets and crates and maybe even make a wall and peg board to hang them to save space and have them handy.  Don’t forget about your plant cages and support systems.  Clean up space in the barn to store hay and feed. Now is a good time to get a good deal on hay if you help farmers collect directly out of the field, saving them work and storage. Protect your investment from mice with a good barn cat and/or pet safe rodent poison/traps. Sealed barrels for your feed is a good idea year round. Do some coop and stall mucking and apply directly to resting beds (don’t apply on beds intended for winter crops) give your animals fresh bedding that can be hay, straw, and saw dust. Get your floating row covers, hoop houses, and cold frames out to ready them for fall crop protection. Add gentle soil refreshers to fall crop beds such as sweet, finished compost, worm castings, sea kelp, soft rock phosphate, mushroom compost, etc. Avoid anything that will burn tender seedlings or might carry pathogens. Its a good time for green cover crops like vetch. Seeding and planting transplant fall crops as soon as their beds are ready. Get your seasoned fire wood stacked, covered loosely, and convenient to bring into the house on cold, blustery days ahead. Start thinking about how you are going to keep your animals water thawed. Pull up irrigation and winterize outdoor spigots. Get your root crops, apples, pears, potatoes, fall squash cured and ready for storage. If you have a root cellar or basement you’re one lucky dog. If not find a cool, dark, dry spot in the house, wrap fruits in newspaper and store loosely in cardboard boxes, bags, or crates.  They will be nice and sweet in a few months as the carbs transform into more sugar. Store your root crops loosely, but its not as essential to wrap them up individually as they don’t put off ethylene gas. Check on them periodically for winter and eat things that are going downhill and throw the bad stuff to the hogs or chickens (unless its absolutely horrible moldy). Feed, feed, feed your animals to store fat for the cold days. Chickens are probably molting so give them non-medicated gamebird feed, calf manna, and flock blocks. If you are hunter they enjoy to pick the carcass clean, just no gut piles. They need the extra protein to renew their feathers and get back to making eggs. If you are a hunter get in the woods and stock your freezer! Your green house is another things to consider collecting, organizing, starting greens and other fodder crops.  Use your space efficiently and you will reap bountifully year round.

Don’t get too wrapped up in work though, take a stroll through the woods and enjoy the colors of autumn, the leaves will fall before you know it. Do some yoga in the woods to rest your body from all the work taking care of a homestead entails, the earthy smells of the forest will sweeten your practice. Watch for fall goodies like mushrooms, apples, pears, and persimmons. Make bouquets and take them to friends, the drive will give you more scenic pleasure and the visits you made with friends will be comforting when cabin fever sets in. Happy Homesteading!

IMG_3833 IMG_3857 IMG_3877IMG_3844

West Mountain Farm and Garden CSA

CSA stands for Community Supported Agriculture, it is a way for farmers and clients to have a closer relationship and share the in season produce, eggs, and flowers. We will be using a ‘pay-as-you-go’ food box CSA that will use the Arkansas Yoga Center as a drop-off/pick-up location. Many CSA’s ask for an upfront payment for the entire season, we are choosing the ‘pay-as-you-go’ system for the ease of the client and the unpredictable nature of farming. There will be a money can on the back deck at AYC. We ask that no produce shall enter the AYC building, all pick-ups and exchanges will be done on the back deck at AYC through Arianna. We will be doing a Thursday and Sunday morning exchange (specific time to be announced). More logistic details to come. This is also our first year selling our products this way, so the needs of our customers in relation to the ebb and flow of product availability is a new journey for us! More details to come after I receive feedback.

We will be limiting the number of shares to 20 (first come basis), our choice of shares are:


Produce box: $20

-tomatoes, eggplants, tomatillos, hot and sweet peppers

-squash, zucchini, cucumbers, okra, green beans

-beets, radish, carrots, corn

-fresh culinary and tea herbs

-and more!


Tomato only box: $20

-a plethora of sizes, shapes and colors sure to please


Cut Flower add on: $7

-small to medium bouquet of flowers and herbs


Free Range Egg add on: $3

-1 dozen fresh eggs


Our farm produces and raise animals and vegetables in a biodynamic way that saves energy, utilizes resources to their highest potential, no synthetic fertilizers or pesticides, and aims to leave the land better than when we arrived. All of this effort produces flavorful and nutrient dense produce and healthy happy animals!


If you are interested in participating please email us back with this completed questionnaire (copy and paste for convenience).


The share I would like to purchase is:


I would like to pick up my share on Thursday or Sunday (choose one) morning.


I would like a weekly or bi-weekly share (choose one).


My least and favorite vegetable is:


My contact information is (phone and email):


I am interested in this CSA program….


First come, first serve basis so reply quickly!


Questions, concerns, or request are welcomed and appreciated.


Please contact Arianna or email at westmountainfarm@gmail.com .


Other ways to stay connected are www.westmountainfarmandgarden.com and our Facebook page West Mountain Farm and Garden.


Please stay tuned for when the CSA program will begin delivering boxes. Produce starts generating heavily and consistently at the end of May. You will only be charged for the produce, eggs, and flowers you receive, regardless of the ‘shares’ you signed up for.


We understand that situations change and unforeseen circumstances can disrupt our daily schedule. If you or someone else can’t pick up your order or you find yourself in financial hardship, please notify Arianna, I’m sure we can come to a reasonable solution. If an order isn’t picked up once, we understand, if it happens twice your participation in the CSA program will be cancelled.


If you are unable to pick your box up it can always be donated to Community Emergency Outreach (http://www.ceofayetteville.org/), you will still be expected to pay for your share in this situation.


Thank you for your support it is appreciated in so many ways!

IMG_3363

Dipel Dust – A Biological Insecticide

Dipel Dust is a biological insecticide used against caterpillars, leaf eating worms, and other larvae, it is certified by OMRI (Organic Material Review Institute) for use in organic production. It is a microorganism Bacillus thuringiensis, Bt, subspecies kurstaki strain that is lethal to a variety of larvae after ingesting small amounts. It is safe for mammals, bees, birds, aquatic life, earthworms, pollinators, and many other beneficial insects. The only downside is that it will kill butterfly caterpillars, but as long as you use it sparingly and keep it off their favorite plants (rue or wormwood for example) you probably won’t notice any less butterfly activity. It is essential for organic brassica crops, because it kills loopers, cabbageworms, and more. If you have a tomato hornworm or fruitworm problem you can safely use it on your tomatoes. We prefer handpicking and interplanting with basil to deter them, we never seem to have much of a problem with hornworms. Mixing some in water and dipping seedlings in the mixture before you plant will take care of cutworms while your plants get established. Webworms, leafrollers, tent caterpillars and other tree and shrub pest can be taken care of with a generous dusting. Sod webworms bothering your lawn fall victim to Bt. This is only a small example of a large list of caterpillars and worms Dipel Dust is lethal to when ingested in small amounts.

Bt is usually used in a powder form, but can also be bought in a liquid form and sprayed on plants. Some people have had success injecting squash vines to stop the squash vine borers, timing is essential though, it must be done before too much damage has occurred.

I mix Dipel Dust in my potting soil for seedlings and houseplants, if I didn’t I would lose many plants to the larvae of the fungus gnats. They are a serious greenhouse and indoor plant pest. The adult flying gnat doesn’t bite or feed, but they are an indicator that you have a fungus gnat problem. The larvae cause damage by feeding on roots, plant exudates, algae, and fungus in the soil. They are a disease vector and slow down plant growth. They are the same gnats you may find in your fruit bowl. Bt sprinkled in all potting soil will prevent the problem from starting and clear up an infestation.

Dipel Dust mixed in potting soil, ready for seedlings.

Dipel Dust mixed in potting soil, ready for seedlings.

Mosquito Dunks are the israeli strain of Bacillus thuringiensis, it is a very effective, safe, and easy control of this summer pest.

Don’t be alarmed if you still see small amounts of the pest, as the adult that lays the eggs are not killed, and the worm/larvae must eat some of the plant material that has the Bt on it, then the worm will stop feeding and die shortly. Wasp and birds can still visit your garden for a snack if used sparingly, or if you get behind on dusting. I don’t mind sharing a little with the wildlife.

Regular use of Bt will greatly reduce crop damage done by fast eating caterpillars. Now you no longer have to eat lacy kale or cabbage, or spray large amounts of chemical pesticides on beloved trees under attack by worms.

Frost Dates

Reading the signs of nature is always tantamount to determining when to plant and when to harvest, but scientific, compiled data is another tool to use to help guide your gardening decisions. Average first and last frost dates is an essential tool that is referred to by seasoned and novice gardeners. Victory Seeds has easy to use tables based on what state you live in to help you use scientific data to guess when your areas most likely first and last frost date will occur. Going by these dates you can prevent plant losses and stunted growth from a late freeze, and you can count back (days to maturity) from your frost date if you want to do a late planting of corn or anything else.

Taking the temperature of the soil in different areas of the garden/property can also give you ideas on where and when to plant things. I use a long cooking thermometer that has a ride range, not only can it be used for roast, but compost piles, and taking soil temps. You can find your hot and cold pockets. Raised beds generally warm up quicker than earth level beds. All if this information can be used to your advantage. For example, you can plant glacier salad tomatoes early in a warmer bed for early season tomatoes or a second spring lettuce crop in an area that stays cool longer. If you live in mountainous terrains you will find that hillsides will vary greatly in temperature. This can be helpful for wildcrafting and foraging, morels anyone ;)!

Right now is a good time to transplant many perennials if done gently and quickly.

The garden is *’waking up‘* so I know its time to put spring bulbs, onions, peas, and potatoes in the ground. *Click on this link for a sweet Radioactive remix that has nothing to do with gardening, but is great for monotonous chores.

IMG_3277

Black Cap Raspberry Swelling Buds

IMG_3268

Asiatic Lilies Emerging

IMG_3269

Pixwell Gooseberry Buds Opening


Seedlings and 2013 Varieties

IMG_2627

Its the end of winter with spring steadily approaching, its time to start planning your garden, planting dormant trees and berries, cool weather crops, ordering from the steady influx of catalogs, and starting seedlings. I am a self confessed seed, bulb, tuber, and anything garden addict. A simple trip to Lowe’s for screws and I return with dahlia tubers, gladiola bulbs, lily bulbs, asparagus crowns and horseradish . For an early start on these I have put them in pots in the greenhouse (last year I did this in the house) and will wait until the soil is around 55 degrees to plant in the garden. The asparagus may be planted directly in the ground right now, if they are still dormant. I suggest going to your local gardening stores, the Farmer’s Co-op, Lowe’s, or Wal-mart early to get your onions, potatoes, bulbs, etc. before they run out and before they lose quality. The warmth and the light in the stores causes everything to think its spring and break dormancy too early. Later in the season you may even have to pick through moldy and rotted selections. If you aren’t ready to plant yet place everything in cardboard or paper bags in the garage or  in your fridge, they need cool temperatures and minimal light exposure to stay dormant. Most things like to be slightly moist and have some air circulation. Checking on them frequently isn’t a bad idea either, rotten or moldy things need to be thrown out immediately.

It is time for seedlings to be started indoors for zone 7, peppers and eggplants need a 6-8 week start and tomatoes need a 4-8 week start. When starting seeds a heat mat or heat coil improves germination and makes a better root system for most plants (columbines and bachelor buttons don’t like the heat). Seedlings need water, sterile potting soil for seedlings, air circulation, proper temperature (55-75 F) and a strong light. Fertilization isn’t required until they get their second set of leaves. Watering and fertilizing from the bottom is best, but don’t let them sit in water. Some flowers like to be started indoors as well, such as rudbeckia and chrysanthemums. Herbs love an early start, basil being fun and beginner friendly, you also get to eat the pruned tops, a nice treat when the weather is still chipper. For those plants that resist transplanting now is a time to get a head start on bed preparation, so they will be ready to sow as soon as it warms up.

This is an introduction to my massive seed collection/obsession and what will be in our garden this year.

I buy many of my seeds from Baker Creek, they are dedicated to non-gmo, anti-monsanto heirloom varieties, they are located in Missouri which qualifies for local in my book, and have ethical business practices as far as I know. Some of the varieties from them I have grown or will be growing again this year are : roma 2 bush beans, fledderjohn soybeans/edamame, ianto’s fava bean, oriental scarlet poppy, love-in-a-mist flowers (above picture), mammoth red rock cabbage, black palm tree cabbage, long island improved brussel sprouts, okra hill country heirloom red, clemson spineless okra, thai round green eggplant, diamond eggplant, fengyuan purple eggplant, ping tung eggplant, beit alpha cucumber, orange bell, albino bullnose bell, golden california wonder bell, emerald giant bell, chinese five color hot pepper, red mushroom hot pepper. The tomato varieties are: amana orange, cream sausage, carbon, cherokee purple, homestead, bonnie best, pantano romanesco, san marzano lungo No.2, amish paste, pink brandywine, egg yolk, mini orange, ozark pink, hssiao his hung shih, black cherry, gypsy purple, dr. wyche’s yellow, and ananas noire.

Baker Creek varieties to take special note of are: the love-in-a-mist flowers, which were sowed in a minimally prepared bed mid-summer and performed quickly and were an interesting looking flower and seed pod. The clemson spineless were not spineless not spine free and quite fibrous, they were only good picked small and pickled. All eggplants performed wonderfully except the diamond, which was minimal, but had a nice quality and kept well for an italian type eggplant. Beit alpha cucumber had too large of seeds and somewhat tough skin, which made it a good pickler when they were small. All bells produced like crazy, the albino bullnose was somewhat bitter, and the golden california was one of the sweetest bells i’ve ever had, the emerald giant was thick walled and picture perfect, great for cooking and freezing.  One plant of each hot pepper took care of my cooking, drying, and canning needs, in addition to being aesthetically pleasing. The cherokee purple and amana orange both got diseases and were pulled before production. The cream sausage was a semi-determinate white paste that produced very well and stayed nicely compact, they would be great for containers and small gardens, they lacked in fresh flavor but made up for it in making a tasty, very light colored yellow sauce with few small seeds.  The gypsy purple produced abundant amounts of slicing sized tomatoes (racquetball sized) with an out of this world taste, they made the best dehydrated/sun dried tomatoes that were a fantastic winter treat in many dishes. The gypsy purple is the BEST producing black/purple tomato I have ever grown, even in last years hot dry summer. Hssiao his hung shih is a yellow pear that can only be described as ridiculous! It produces up until frost MILLIONS of sweet yellow grape tomatoes, it literally flowed over 6 foot tall cages and rooted in the ground and kept producing, a must have for any garden. Ananas noire, black pineapple, not impressed, a waste of space in my opinion. Big and impressive would be the pink brandywine, it never fails me, or anyone else I have met that has grown or eaten them. The pink brandywine was made for BLTs!

My favorite herb and flower seed company is The Thyme Garden a family based non-GMO seed, supplies, hops, and mushroom company based out of Oregon. They have many unusual and medicinal herbs and flower seeds that have a great germination rate, probably due to their beekeeping practices. They are also true stewards of the land with their salmon projects and many organic gardens.  The basil varieties I purchased are: mammoth, purple ruffles, italian large leaf, rosie, digenova, genovese, emily, and quenette. My favorite is the emily which is a small genovese with very tender leaves, great for container or limited space gardening and pesto lovers. Corsican mint and mixed creeping thyme are ‘walkable varieties.’ The corsican mint isn’t for heavy traffic, but it smells delicious and isn’t invasive, it is used in making creme d’ menthe. The creeping thymes aren’t much for culinary use, but look good and attract bees galore when in bloom from reds to white carpets. Salad burnet, roman chamomile, german chamomile, mammoth dill, centaury, white and blue borage, nasturtiums, lemon and tangerine marigold are other seeds I ordered from them. Borage is said to improve the flavor of tomatoes when planted together, and the flowers are edible and a nice addition to a salad or dessert.

Happy shopping and gardening!

IMG_1777

A temporary grow space can be set up if you don’t have a green house. A 400 watt metal halide purchased from Grow Fresh was sufficient for this space.

Manifesto: The Mad Farmer Liberation Front

Manifesto: The Mad Farmer Liberation Front


By Wendell Berry

Love the quick profit, the annual raise,
vacation with pay. Want more
of everything ready-made. Be afraid
to know your neighbors and to die.
And you will have a window in your head.
Not even your future will be a mystery
any more. Your mind will be punched in a card
and shut away in a little drawer.
When they want you to buy something
they will call you. When they want you
to die for profit they will let you know.

So, friends, every day do something
that won’t compute. Love the Lord.
Love the world. Work for nothing.
Take all that you have and be poor.
Love someone who does not deserve it.
Denounce the government and embrace
the flag. Hope to live in that free
republic for which it stands.
Give your approval to all you cannot
understand. Praise ignorance, for what man
has not encountered he has not destroyed.

Ask the questions that have no answers.
Invest in the millennium. Plant sequoias.
Say that your main crop is the forest
that you did not plant,
that you will not live to harvest.
Say that the leaves are harvested
when they have rotted into the mold.
Call that profit. Prophesy such returns.

Put your faith in the two inches of humus
that will build under the trees
every thousand years.
Listen to carrion – put your ear
close, and hear the faint chattering
of the songs that are to come.
Expect the end of the world. Laugh.
Laughter is immeasurable. Be joyful
though you have considered all the facts.
So long as women do not go cheap
for power, please women more than men.
Ask yourself: Will this satisfy
a woman satisfied to bear a child?
Will this disturb the sleep
of a woman near to giving birth?

Go with your love to the fields.
Lie down in the shade. Rest your head
in her lap. Swear allegiance
to what is nighest your thoughts.
As soon as the generals and the politicos
can predict the motions of your mind,
lose it. Leave it as a sign
to mark the false trail, the way
you didn’t go. Be like the fox
who makes more tracks than necessary,
some in the wrong direction.
Practice resurrection.

IMG_2701

There’s nothing like practicing resurrection with potatoes…..


Avocado Omelette

IMG_3260

Ingredients: 

2 eggs

1/2 of a ripe avocado

2 tbsp of milk

pat of real butter

1/4-1 cup of grated cheese (I use muenster with eggs because it melts so well, colby/monterey-jack is my second favorite cheese)

Optional:

Ranchero sauce, salsa, pico de gallo, or hot sauce

Sour cream

cilantro

cooked diced meat (ham, bacon, etc.)

diced black olives

Directions:

Heat up a medium (6-8 inch) skillet on medium, spray with non-stick if you are using anything other than teflon, which I highly recommend. I use an enameled Copco cast iron skillet, bought used on Ebay for a great deal. Add your butter and melt.

Lightly whisk two eggs and the milk in a separate dish, when the butter is melted and the pan is hot, dump the eggs into the skillet, immediately begin ‘pushing’ the egg mixture toward the center of the pan with a soft spatula, scraping the bottom. When the egg begins to set up turn the heat down a bit and let it continue to set up. This process shouldn’t take long, about 3-5 minutes.

Add your filling, allow to cook a little longer, when it is almost cooked through fold over and let it continue to cook and the cheese to melt. The edges of the omelette shouldn’t burn or stick to the bottom, but have a little crisp to the edges and be cooked thoroughly when you are done. You can add more cheese to the top, and add your ranchero sauce, cilantro, and/or sour cream.

IMG_3265

Season to taste and enjoy any time of the day!

Improving Soil

Good soil structure is paramount to a successful garden and is the first (earlier the better) place you should start when planning and preparing a garden. Tilth refers to the physical condition of the soil, good soil tilth is loose and friable to a depth that allows for good root penetration and proper drainage. Water shouldn’t stand for long in the garden nor should it run out immediately, proper drainage is a balance of the two extremes. Good soil should also be porous (small spaces for air) and resistant to compaction.

Soil is generally categorized as sandy, loamy, or clayey, the higher percentage of loam you have in your soil is generally better. Digging one spade deep into the ground and inspecting the soil when it is slightly moist (you should never work the soil when it is soaking wet or bone dry, it is not fun and it destroys the soil structure) should give you a good idea of what type of soil you have in various parts of your property. Obviously, you should select the sight with the best soil, proper drainage, and 8 plus hours of sun a day, but sometimes we don’t have this trifecta of garden heaven and we have to take matters into our own hands-soil amendment at our selected sight or existing garden spot.

If you have sandy soil and plan on planting something other than drought tolerant plants that like excellent drainage such as: rosemary, sunflowers, and succulents adding organic matter  will make your soil more loamy and retain moisture. Loamy soils need to be maintained over the years, add back as much or more of what you take out, leaving the earth better than when you started. Clayey soil needs greensand, regular sand, and organic matter to break up the clay and improve drainage. Clay soil also needs a load of topsoil to give you working soil in your lifetime (don’t break your back or wallet on clay soil). Barnyard manure (rabbit, cow, and chicken being my personal favorites) that is mixed with natural bedding such as straw is your top choice; it adds moisture retaining properties, nutrients, and microbes that bring your soil to life in each smelly shovelful. Add manure that is well-rotted or add it in winter time at least 2 months before planting. Other soil amendments that give your soil proper drainage and aeration are coffee grounds, peat moss, coco coir, kitchen scraps (egg shells, fruit, and vegetable peelings), rice hulls, cotton burr compost (or any other compost), green cover crops, chopped leaf mold, bark, and sawdust (except walnut or cherry). All of these things should be generously added to all types of soil to keep up with the demands of vegetable gardening for proper tilth, microbial life, and nutrients, eliminating the need for harsh synthetic fertilizers.

These amendments can be added in by double digging for poor soils or gently incorporated with a hoe or other garden tool if your soil isn’t compacted. Moderate use of a tiller or tractor can be used, being careful not to overwork the soil and destroy the very tilth you are trying to build. Also work the soil when it is moist like a sponge, if it forms mud, frozen or is very dusty wait another day.

To preserve your hard work try to have designated walking areas and stay out of the root zone/planting area. Add a 2-6 inch mulch to suppress weeds, moderate soil temperature, retain moisture and prevent erosion. Watch for slugs and root rot on susceptible plants. Pull the mulch back around the base of plants if you start to notice any root rot or pest problems hiding in your mulch. Heavy rains will erode and compact bare soils as well. Many things work as mulch, my preferred combination is cardboard or black and white newspaper, well rotted manure, then straw or bark mulch on top. This slowly breaks down and adds to the soil.

With these practices put into place year-round you can have 10-18 inches of earthy, chocolate-colored, workable dirt in as little as one season without further damaging our earth or watersheds, and your bountiful garden will be your reward.

IMG_3122

Garden soil with visible mycorrhizae strands and various organic matter.

On the subject of topsoil creation- “It takes these processes perhaps 500 years to make one inch of soil, but man with his destructive farming practices can destroy an inch in only a few years.” -Organic Farming and Gardening Magazine-

Post Navigation

NWOAA

The directory of artists, photographers, and creatives of the United States.

mikethechickenvet

A chicken vet's perspective on the world

shanti fayetteville

yoga and inquiry

giantveggiegardener

—an artisan farmer's journey

frugalfeeding

n. frugality; the quality of being economical with money or food.

Seasonsgirl

For seasons of life, the changing seasons, and the seasoning we all love to cook with.

West Mountain Farm

Pastured Pigs, Free-Range Chickens, Biodynamic Gardening, Homesteading

Beyond Organics Farm

Pastured Pigs, Free-Range Chickens, Biodynamic Gardening, Homesteading

Dig In Festival

Pastured Pigs, Free-Range Chickens, Biodynamic Gardening, Homesteading

StreamingGourmet

Pastured Pigs, Free-Range Chickens, Biodynamic Gardening, Homesteading

WordPress.com News

The latest news on WordPress.com and the WordPress community.