West Mountain Farm

Pastured Pigs, Free-Range Chickens, Biodynamic Gardening, Homesteading

Archive for the month “October, 2013”

Supplemental Lighting For Laying Hens

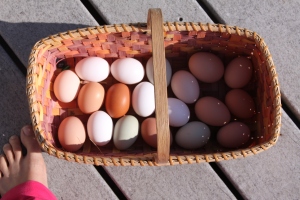
So, its been a great spring and summer with a daily basket full of eggs, as a homesteader you couldn’t be more thrilled. Then, the temperature drops, the leaves turn colors, and the hours of daylight begin to shrink-along with your bounty of eggs. You walk into the coop one morning and it looks as if a pillow fight has occurred, the coop is more quite, and your once fluffy chickens look a little worse for wear. The autumn molt has began and the process should be allowed to continue, they usually lose their feathers in patches, the most noticeable being the neck and tail feathers (a good time to collect for crafts).  The process takes one to three months depending on what kind of nutrition they are given, breed, and age of the chicken. They need extra protein at this time to regrow new feathers and get back to laying eggs and staying warm. The first molt usually occurs their second fall after their first laying ‘season.’ So if you had spring/late winter chicks they should  begin laying that first fall and then go through a molt the NEXT fall.  If they have adequate nutrition your first season chickens should lay all winter, spring, and summer with a gradual increase and subsequent decrease, without the help of lights. Now that your hens are molting its time to accept the empty basket of eggs and simply feed them well and give them peace and quiet until they all but through with the process. Handling should also be limited because the tender new feathers coming in damage easily and are probably uncomfortable to be messed with.

Around mid-October or early November the molt should be coming to a close and your hens got a rest from laying. You may notice that their combs and wattles are light pink instead of bright red and they seem to have smaller hips, instead of the volumptous hen petticoat booty. This is a sign that their hormones still haven’t kicked back into gear after the molt, this is were the supplemental lighting comes in handy.  The short day length will keep it that way until spring as a way to adapt to the lack of food in winter. Since they have you to graciously feed them year-round this winter survival adaptation is no longer necessary. The coop lighting will stimulate the pineal gland and kick start the endocrine system back into laying mode. There are many ways to do this and it may take some research on your part to find what works best for you and your flock. I will describe our method as it has worked well for us and is backed by experience and scientific research.

When we see that the molt is coming to a close and the hens have had at least a one month rest, which happens to be this time of year, we place a soft white bulb (you could even use christmas lights) in the coop and put it on a timer to come on in the MORNING and turn back off anytime after sunrise to save electricity. I heard you shouldn’t use fluorescent lights because chickens can see the slight flicker and it drives them nuts. All kinds of inexpensive timers can be bought at your home improvement stores. This will ensure constancy in the light sequence because you are going to forget one morning. The reason not to artificially increase day length in the evening is because we want them to go to roost at night and not be confused by the light and get lost.  We set it to come on 30 minutes before sunrise for a week, and increase it by 30 minutes every week until they have reached 15-16 hours of light. A quick google of sunrise times for your location will give you  a specific time and continue to adjust to keep up with the changing sunrise/sunset cycle. In 2-6 weeks they should start laying again (so they still get a little more of a rest).  When it gets really cold I switch the light to a heat bulb, but please make sure that it is secure.  You still run the risk of an accident with a heat lamp, but its one I am willing to take  to prevent frostbite, conserve calories, and have a defrosted water pan. We still run electric cords to the coop but plan to wire it soon, we even have the supplies to bury the line, we just have an endless to-do list. We also need electricity because we plan to wrap our Chicken Fountain in heat tape so we can use it year round. The places where I plugged extension cord to extension cord and where the light is plugged in is protected by a feed bag that I cut the other end off. I basically put a ‘pillow case’ at each plug in so the chickens can’t scratch or peck at it. Yes, I know its hillbilly, but we make the best of what we have 🙂

Some people leave a light on all the time, I do not agree with this nor do poultry experts. They really need 8-9 un-interrupted dark period, just like we do. I think if you allow the hen to come into and out of the molt without interference coupled with sound nutrition and fresh water she will have adequate rest and won’t be ‘used up’ before her time or have her lifespan shortened. Each hen is born with more ova than she can turn into eggs in her lifetime, so no worries there either. I know some people feel like chickens deserve a break all winter, but I don’t think it harms them, and this is a homestead, not a zoo. It just wouldn’t be sustainable to feed them all winter every winter with very few eggs. And this was an adaptation in response to lack of food, which isn’t a problem anymore, they are quite spoiled compared to their ancestral jungle fowl. No body freeloads around here as we all work together and support each other, and if I don’t have some eggs to fuel my body to work the farm then everyone is in trouble and hungry.

In summary, lights are usually needed only their second winter after they have completed their first laying season. Your situation may vary depending on when they were hatched and other environmental factors.  Allow them to have a natural, uninterrupted molt and rest. After the molt, introduce light gradually in the morning with a timer for convenience and then put it away in spring when the daylight has lengthened again. Be safe with bulbs and electricity, chickens do fly and get rowdy. Consider professional wiring for safety and ease of use.  Devise and provide a good nutrition plan with access to fresh drinking water and good husbandry.  As the hens mature you will probably get less eggs over time, but they will increase in size and have less egg abnormalities

IMG_3108

Cooking Fresh Green Beans

Most people are used to bland canned or frozen green beans from the grocery store that are basically season, heat, and eat.  Fresh green beans take a little more effort, but are more than worth the extra time. The best way is to have a friend with you as it does get monotonous.

First step is to pick the green beans. Pick your plants heavy and often and they will keep producing, all season. Before you know it you’ll be wondering when the freeze is going to kill them out!

Next, sort the beans, pick the tender, young pods free of rust for yourself and give the big fibrous ones that you missed last picking to the hogs, worm bed, chickens, or wildlife.

Third, string them if they are a string variety. Did you know the first stringless green bean was named ‘lazy housewife’ ? You want to pick the strings from all four ‘corners’ of the bean removing as much as you can. I hear a green bean frencher makes this job a breeze, but then they are all french-style. I’m sure I’ll try one day, but so many gadgets, so little time. Then you snap them into bite size pieces or leave whole for other dishes. Give the ends of the beans to the critters also.

Fourth, Cook them in a bit of fat, liquid, seasoning. My favorite fats are extra-virgin olive oil, butter, and pork drippings (and add the meat back toward the end if available). I like my liquid to be broth and a splash of dry wine in the end. You can season with sauteed garlic and onions (if so do this in the beginning before you add your beans and liquid) or the convenient route- garlic and onion powder. Salt and pepper of course, and some herbs out of the garden the last 5 minutes of cooking time. Different beans have varying cooking times and preference for eating. Tender yellow bush beans only need a quick steam, a drizzle of lemon juice, salt and pepper, and olive oil to make for a delicious side. Pole beans often need 20 -40 minutes to cook down and become tender. This property makes them more suitable for canning.  Adding tomatoes, squash, and mushrooms during the cooking will make a meal out of your green beans.  Play with the recipe, taste test often.   You will have you feel for bean snapping and cooking in no time.  And the plant will give you plenty of beans to experiment!

Last, Eat them!!!

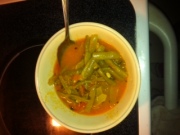
Here’s a heartier, soupy version I made after working in the garden all day. The liquid is chicken broth, tomatoes, and maitake mushrooms cooked down with some fresh herbs (lemon thyme, parsley, and basil) powdered garlic and onion. Add parmiggiano reggiano for a rich treat. Olive oil and butter bring out the flavors and make the nutrients more bioavailable.  These pole beans, a mixture of kentucky wonder and bush blue lake, took about 20 minutes at low-medium to cook down to my desired tenderness.

photo-11

Savor your bounty, you earned it. 

Putting Your Garden to Bed and Preparing the Homestead for Winter

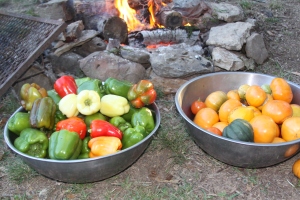
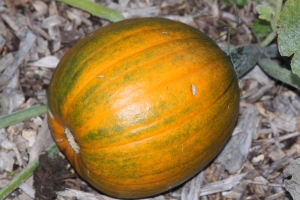
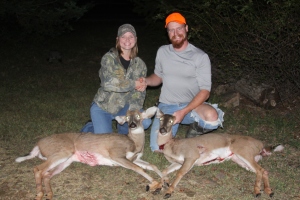
Now is the time to start the process of putting your garden to bed. Things are in their last push and other warm weather loving plants are dying, consecutive cold days and nights are coming, so pick everything you can ASAP, dry herbs, make green tomato relish, freeze bell peppers, dehydrate, freeze, etc. Remove disease and bug harbors like dead tomato vines, other nightshades, and curcubits (squash and cucumbers). Okra, corns stalks, and dead herb branches can be incorporated into the soil or composted. Adding mulch and organic matter is the most important, which can protect perennials, bulbs, and the soil structure itself. Now is also a great time to add soil amendments that will be bioavailable for your garden next spring. Lime all the beds that are going to rest for winter. Taking care of your investment of garden tools is important if you want to get all the life out of them that they are worth. Collect them from the yard, give them a quick clean, let them dry in the sun, oil movable parts, and sharpen blades. If nothing else, get them out of the weather in a barn or shed to protect them from the elements. If you are feeling really spunky you can organize them in buckets and crates and maybe even make a wall and peg board to hang them to save space and have them handy.  Don’t forget about your plant cages and support systems.  Clean up space in the barn to store hay and feed. Now is a good time to get a good deal on hay if you help farmers collect directly out of the field, saving them work and storage. Protect your investment from mice with a good barn cat and/or pet safe rodent poison/traps. Sealed barrels for your feed is a good idea year round. Do some coop and stall mucking and apply directly to resting beds (don’t apply on beds intended for winter crops) give your animals fresh bedding that can be hay, straw, and saw dust. Get your floating row covers, hoop houses, and cold frames out to ready them for fall crop protection. Add gentle soil refreshers to fall crop beds such as sweet, finished compost, worm castings, sea kelp, soft rock phosphate, mushroom compost, etc. Avoid anything that will burn tender seedlings or might carry pathogens. Its a good time for green cover crops like vetch. Seeding and planting transplant fall crops as soon as their beds are ready. Get your seasoned fire wood stacked, covered loosely, and convenient to bring into the house on cold, blustery days ahead. Start thinking about how you are going to keep your animals water thawed. Pull up irrigation and winterize outdoor spigots. Get your root crops, apples, pears, potatoes, fall squash cured and ready for storage. If you have a root cellar or basement you’re one lucky dog. If not find a cool, dark, dry spot in the house, wrap fruits in newspaper and store loosely in cardboard boxes, bags, or crates.  They will be nice and sweet in a few months as the carbs transform into more sugar. Store your root crops loosely, but its not as essential to wrap them up individually as they don’t put off ethylene gas. Check on them periodically for winter and eat things that are going downhill and throw the bad stuff to the hogs or chickens (unless its absolutely horrible moldy). Feed, feed, feed your animals to store fat for the cold days. Chickens are probably molting so give them non-medicated gamebird feed, calf manna, and flock blocks. If you are hunter they enjoy to pick the carcass clean, just no gut piles. They need the extra protein to renew their feathers and get back to making eggs. If you are a hunter get in the woods and stock your freezer! Your green house is another things to consider collecting, organizing, starting greens and other fodder crops.  Use your space efficiently and you will reap bountifully year round.

Don’t get too wrapped up in work though, take a stroll through the woods and enjoy the colors of autumn, the leaves will fall before you know it. Do some yoga in the woods to rest your body from all the work taking care of a homestead entails, the earthy smells of the forest will sweeten your practice. Watch for fall goodies like mushrooms, apples, pears, and persimmons. Make bouquets and take them to friends, the drive will give you more scenic pleasure and the visits you made with friends will be comforting when cabin fever sets in. Happy Homesteading!

IMG_3833 IMG_3857 IMG_3877IMG_3844

Post Navigation

NWOAA

The directory of artists, photographers, and creatives of the United States.

mikethechickenvet

A chicken vet's perspective on the world

shanti fayetteville

yoga and inquiry

giantveggiegardener

—an artisan farmer's journey

frugalfeeding

n. frugality; the quality of being economical with money or food.

Seasonsgirl

For seasons of life, the changing seasons, and the seasoning we all love to cook with.

West Mountain Farm

Pastured Pigs, Free-Range Chickens, Biodynamic Gardening, Homesteading

Beyond Organics Farm

Pastured Pigs, Free-Range Chickens, Biodynamic Gardening, Homesteading

Dig In Festival

Pastured Pigs, Free-Range Chickens, Biodynamic Gardening, Homesteading

StreamingGourmet

Pastured Pigs, Free-Range Chickens, Biodynamic Gardening, Homesteading

WordPress.com News

The latest news on WordPress.com and the WordPress community.